
Smart lock installation is a fantastic way to upgrade your home’s security while adding convenience to your daily life. Whether you want to ditch your traditional keys or gain remote access to your door, knowing how to install a smart lock can make the process seamless. Installing a smart lock is easier than you might think.
This beginner-friendly guide will take you through the process step-by-step, ensuring your new smart lock is installed securely and functions perfectly.
How to Install a Smart Lock
Tools You’ll Need
Before starting the smart lock installation process, it’s essential to have the right tools on hand. Gathering everything beforehand ensures a smooth and hassle-free setup. Here’s what you’ll need:
- Screwdriver (usually a Phillips head): This is your primary tool for removing the old lock and securing the new smart lock components. A Phillips head screwdriver is the most common type required for this job, but double-check the screws included in your smart lock kit to confirm.
- Measuring Tape: Accurate measurements are critical when installing a smart lock. Use a measuring tape to check the size of the holes in your door and ensure they match the dimensions specified in the smart lock instructions.
- Drill (if needed, based on your door setup): Most doors are pre-drilled to standard dimensions, but if your door needs adjustments, a drill will help you create or widen holes to fit the new lock. Make sure you have the appropriate drill bits for this task.
- Your Smart Lock Kit (including instructions): Your smart lock kit contains all the components needed for installation, such as the deadbolt, interior and exterior lock pieces, screws, and possibly a strike plate. Always refer to the manufacturer’s instructions included in the kit to ensure proper installation and avoid damaging any parts.
Having these tools ready will save you time and make the smart lock installation process straightforward and efficient.
Step 1: Remove the Existing Lock
Before installing your smart lock, you need to remove the old lock system. This process is straightforward and requires just a few steps:
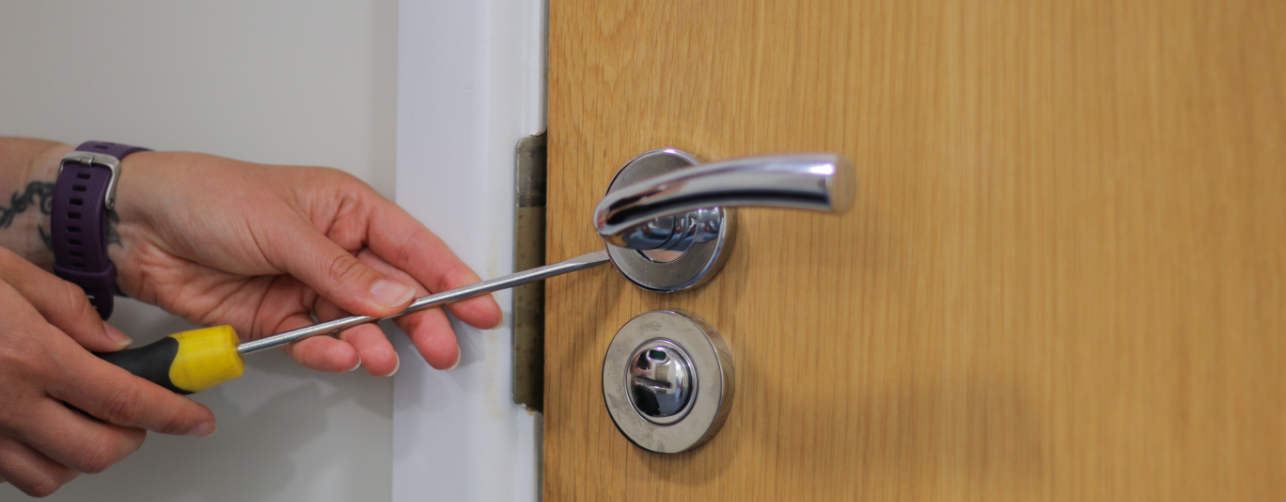
1. Unscrew the Existing Lock
Locate the screws on the interior side of your current lock. These screws typically hold the lock’s inner and outer components together. Use your screwdriver to remove them carefully. Once the screws are out, separate the lock components.
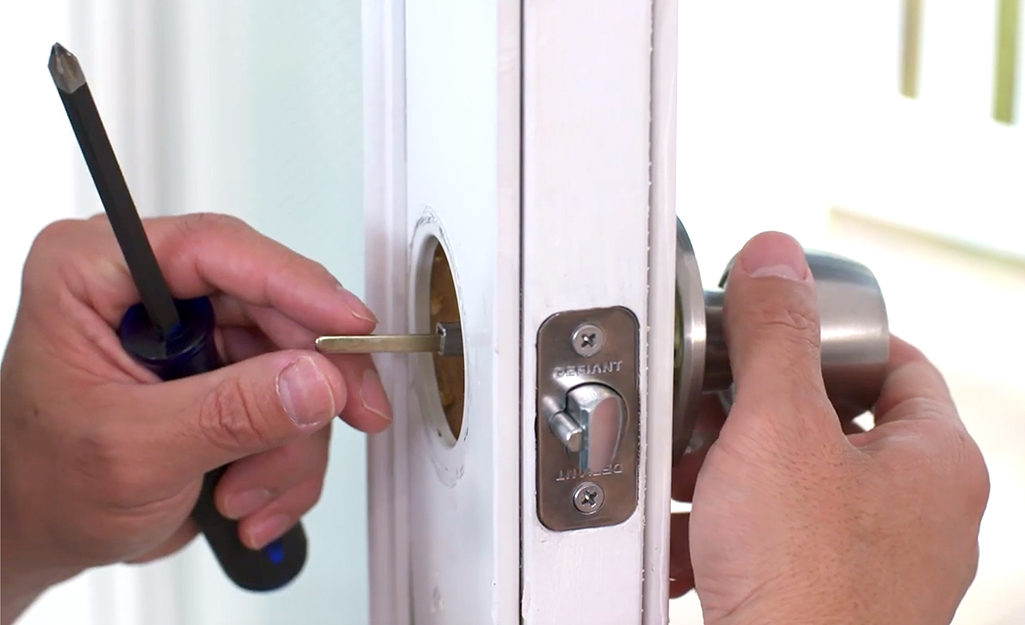
2. Take Out the Lock Cylinder
With the screws removed, you should be able to gently pull the lock cylinder and mechanism out from the door. If it feels stuck, apply slight pressure while ensuring you’re not forcing it, as this could damage the door.
3. Check the Door Hole Size
Once the old lock is out, measure the diameter of the hole in your door using a measuring tape. Compare it to the size specifications provided in your smart lock’s instructions. Most smart locks are designed to fit standard pre-drilled holes, but if adjustments are needed, you may need to use a drill or consult a professional.
Step 2: Prepare the Door for Installation
With the old lock removed, it’s time to prepare your door to ensure the smart lock fits perfectly and functions properly.
1. Clean the Area
Check the surface of your door around the hole. Remove any dust, debris, or leftover adhesive from the old lock to create a smooth, clean surface for the new lock. This step helps ensure the smart lock sits flush against the door for a secure fit.
2. Check the Alignment
Inspect the alignment of the deadbolt hole and the strike plate on the doorframe. Misalignment can cause issues with the smart lock’s functionality, such as difficulty locking or unlocking the door. To verify alignment:
- Manually insert the deadbolt or a similar object into the hole.
- Check if it moves smoothly into the strike plate without resistance.
If adjustments are needed, use a drill or adjust the strike plate’s position to create proper alignment.
By completing these steps carefully, you’ll have a solid foundation for a successful smart lock installation. Proper preparation ensures the lock fits snugly and operates smoothly, giving you peace of mind about your home’s security.
Step 3: Install the Deadbolt Mechanism
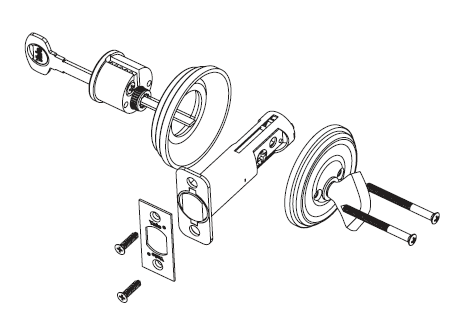
The deadbolt mechanism is a crucial part of your smart lock, providing the main locking functionality. Installing it correctly ensures security and smooth operation.
1. Insert the Deadbolt
Take the deadbolt from your smart lock kit and slide it into the hole on the edge of the door. Many deadbolts have an arrow or marking labeled “UP” to guide you; ensure this arrow is facing upwards during installation. This step ensures proper alignment with the rest of the lock components.
2. Secure the Deadbolt
Once the deadbolt is in place, use the screws provided in the kit to secure it to the door. Insert the screws into the pre-drilled holes and tighten them firmly using your screwdriver. Avoid over-tightening, as this can strip the screws or damage the lock mechanism.
Step 4: Attach the Exterior Smart Lock
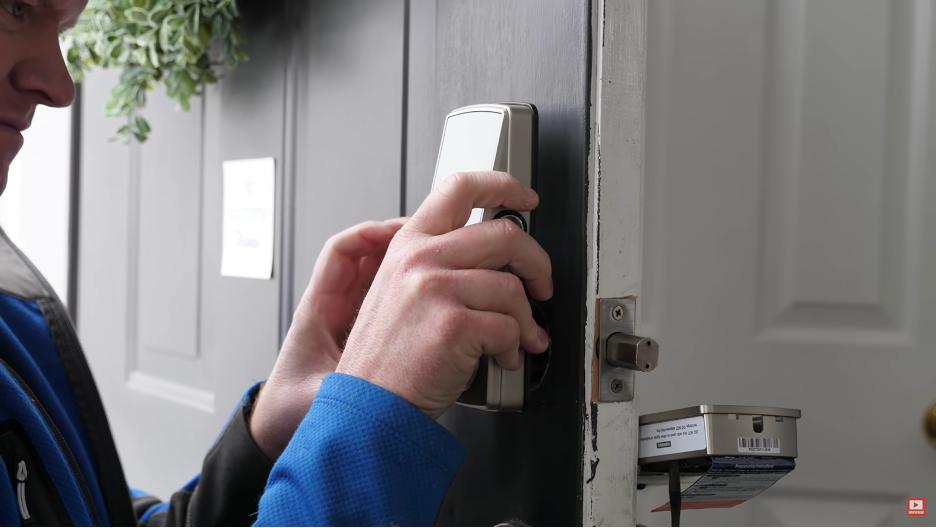
The exterior smart lock is the visible part of the lock that faces the outside of the door. It often includes the keypad, fingerprint scanner, or other external access features. Proper smart lock installation ensures smooth operation and security.
- Align the Keypad or Lock Body: Position the exterior component against the door. Align it so the connecting spindle (a metal piece that rotates to lock and unlock the deadbolt) fits securely through the hole in the deadbolt mechanism. Proper alignment is critical for the smart lock to function seamlessly.
- Hold It in Place: Once aligned, hold the exterior piece steady to prevent it from shifting or falling while you work on the interior component. If your kit includes a temporary adhesive or stabilizing clip, use it to secure the exterior part during this step.
By carefully installing the deadbolt and exterior components, you’re laying the groundwork for a functional and reliable smart lock system. Now that you know how to install a smart lock, take your time to ensure all parts are properly aligned, as this will simplify the remaining installation steps.
Step 5: Install the Interior Component
The interior component is the part of the smart lock that you’ll interact with from inside your home. It typically houses the battery pack, wiring, and additional electronics. Proper installation ensures that your smart lock installation functions seamlessly.
- Align and Attach: Take the interior assembly and position it on the inside of the door. Align it carefully with the exterior component and ensure the connecting spindle from the exterior lock fits into the designated slot on the interior piece. Double-check that everything is straight and flush against the door.
- Connect the Wiring (if applicable): Some smart locks require you to connect a small wire between the interior and exterior components to power the lock’s electronics. If your lock has this feature:
- Secure with Screws: Once everything is aligned and connected, use the screws provided in your kit to fasten the interior assembly to the door. Insert the screws into the pre-drilled holes and tighten them securely.
Now that you’ve installed the interior component, you’re one step closer to completing your smart lock installation. Next, you’ll insert the batteries and test the lock to ensure it works flawlessly.nd tighten them with a screwdriver. Be careful not to over-tighten, as this could strip the screws or warp the lock assembly.
Step 6: Insert the Batteries
Most smart lock installation processes involve battery-powered locks, making them easy to maintain without the need for hardwiring. Installing the batteries correctly is a vital step in activating your smart lock.
- Open the Battery Compartment: Locate the battery compartment, usually found on the interior side of the lock. This compartment is often hidden behind a cover that slides or pops open.
- Insert Batteries: Check your smart lock’s instructions to determine the type and number of batteries required (commonly AA or AAA). Insert the batteries into the compartment, ensuring they are oriented according to the positive (+) and negative (-) markings.
- Replace the Cover: Once the batteries are securely in place, close the battery compartment. Ensure the cover is snapped or locked in properly to protect the batteries and maintain the lock’s sleek appearance.
With the interior component installed and the batteries inserted, your smart lock is almost ready to use. These steps set the stage for testing and activating the lock’s smart features in the final stages of installation.
Step 7: Test the Lock Mechanism
Before wrapping up the process, it’s crucial to test the smart lock to ensure it operates smoothly and securely. Knowing how to install a smart lock correctly includes verifying its alignment and functionality.
Check Alignment: Ensure the deadbolt slides smoothly into the strike plate without resistance. If it doesn’t align properly, adjust the strike plate or deadbolt positioning. A misaligned strike plate can cause the lock to stick or fail to engage fully.
Manually Test the Deadbolt: Turn the deadbolt manually using the interior mechanism to confirm that it moves freely. Ensure there’s no sticking or resistance when locking or unlocking. If you encounter any issues, check the alignment of the deadbolt and strike plate.
Test with the Keypad or App: If your smart lock includes a keypad or smartphone connectivity, test its functionality.
- If the lock is app-enabled, test the connection by locking and unlocking the door via the app.
- Use the keypad to enter a default or setup code to lock and unlock the door.
Step 8: Set Up the Smart Features
Once the physical installation is complete and the lock mechanism is tested, it’s time to activate and configure the smart features. This step allows you to fully utilize your smart lock’s advanced capabilities.
1. Download the App
Find and download the manufacturer’s app on your smartphone. Most smart lock brands have dedicated apps available on iOS and Android. Open the app and follow the prompts to begin the setup process.
2. Pair the Lock
Connect your smart lock to your home network via Wi-Fi or Bluetooth, depending on its design:
- Turn on your phone’s Bluetooth or connect to Wi-Fi as directed.
- Follow the app’s instructions to pair the lock with your device. Some locks may require you to scan a QR code or enter a pairing code provided in the instructions.
3. Set Up Access Codes
If your lock includes a keypad, create unique access codes for yourself, family members, or trusted individuals. This is especially useful for managing who can enter your home and tracking usage.
4. Test Smart Features
Now that your lock is set up, test its smart capabilities:
- Try locking and unlocking the door remotely using the app.
- If your lock is compatible with voice assistants like Alexa, Google Assistant, or Siri, enable the skill or feature and test voice commands.
- Check additional features such as notifications, auto-lock, or geofencing to see if they function as expected.
With these steps complete, your smart lock is fully operational and ready to provide enhanced security and convenience. Always keep the app updated and check the batteries periodically to ensure optimal performance.
Step 9: Secure the Lock and Enjoy
With the installation and setup complete, the final step ensures your smart lock is securely in place and ready to provide convenience and peace of mind.
1. Tighten All Screws
Give the lock one final check to ensure that all screws—both on the interior and exterior components—are tightened securely. This step adds stability and ensures that the lock is properly fixed to your door, minimizing the risk of tampering or misalignment over time. Avoid over-tightening, as this could damage the lock or door.
2. Familiarize Yourself with the App
Spend some time exploring your smart lock’s app to understand its features and settings. Many smart locks offer useful options such as:
- Auto-Lock: Automatically locks the door after a set amount of time.
- Activity Tracking: View a log of when the door was locked or unlocked and by whom.
- Guest Access: Temporarily grant access to visitors or service providers via a unique code or app invitation.
Getting comfortable with these features will help you make the most of your smart lock’s functionality.
3. Keep Spare Batteries Handy
Smart locks typically notify you via the app when the battery is running low. To avoid being locked out unexpectedly, keep spare batteries on hand. Make it a habit to replace the batteries as soon as you receive a low-battery alert. Regular battery checks can save you from unnecessary stress.
Enjoy Your Smart Lock!
Congratulations! You’ve successfully completed your smart lock installation. Not only have you upgraded your home security, but you’ve also added convenience and peace of mind. With proper maintenance and occasional software updates, your smart lock will provide reliable service for years to come.
Whether you use it to lock your door remotely, grant access to guests, or simply enjoy the sleek modern design, your smart lock is a fantastic addition to your home. Now that you know how to install a smart lock, you can enjoy its benefits and enhanced security features.
0 Comments